Posts

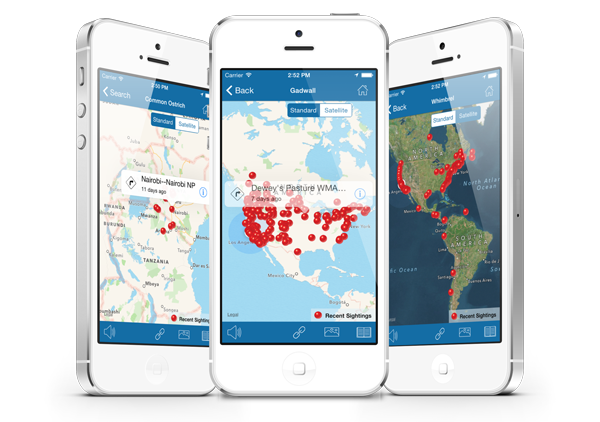
BirdsEye for iOS Gets an Update

Thanks to feedback from many users and testing done by our team, we have made some improvements and added a few new features to the BirdsEye Bird Finding Guide!

The update to version 2.6.1 includes:

  • New formatting for efficiency across all device sizes
  • Improved functionality: Bugs causing issues when browsing locations and when linking to our other birding apps have been fixed!
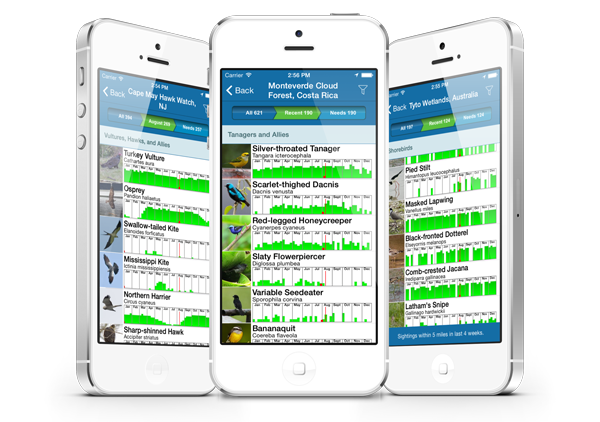
  • Smart Search included on every species list for quick bird identification when in the field. To use this feature, tap the magnifying glass icon (with a ‘+’) in the top right corner of a species list page. For users familiar with these pages, this icon has taken the place of the filter icon– the filter icon is now located in the bottom corner of the species list pages.
  • Download your life list to your mobile device – a request we received from many users. Visit your life list page and tap the download icon in the top right corner.

We hope these updates make your birding better than ever! And as always, we would love to hear your feedback. Contact us at support@getbirdseye.com

How to use a powerful BirdsEye feature: Filters

BirdsEye is the best app to find out what birds are being reported around you. Make sure to check in regularly with BirdsEye to see the birds sighted near your favorite hotspots, or explore distant areas to plan birding stops on your next trip.

There are two main views for checking on sightings: maps view and abundance charts.

Maps

This view is straightforward and provides all sightings of a species with eBird reports from the past 30 days. You can zoom and pan the maps to search a broader area or for a more close up view.

sightings-s

Abundance Charts

Abundance Charts provide bar graphs that show how frequently a species is reported based on the filter settings for that location. Only those species within the time and distance settings are shown in the list.

abundancemaps-s

How to customize the lists

Filter icon

Filters allow you to customize the search by proximity to your location and how recently the sightings were made.

You can change the search distance, miles or kilometers, and the timeframe. Focus in on just the birds that have been reported a single park, or all sightings within 50 miles or kilometers.

Tap the filter icon (funnel with blue background) in the top right of the BirdsEye screen to make the adjustments. This is perhaps the most powerful feature of BirdsEye.

By working with the filter options you can adjust the view for your current location, any hotspot or one of your designated ‘Favorites.’

Here’s how to adjust the filter settings in ‘Nearby,’ but the same instructions also work when looking at a specific hotspot in the ‘Browse by Location’ or ‘Favorite Locations’ sections of BirdsEye:

  1. Under ‘Nearby’: Tap the funnel icon in the upper right of the screen.
  2. Drag the ‘Distance to search’ slider to the appropriate range you want to view.
  3. Select the ‘Search Timeframe’ for the sightings.
    • on Android, adjust the slider to choose 1, 2, or 4 weeks
    • on iOS, when the ‘Recent Weeks’ option is selected you’ll get another slider that you can adjust for any sightings within the past 1-4 weeks
    • on iOS, the ‘Current Month’ tab provides a view of all birds reported over the past 9 years or so. This option is especially useful when you are birding in a location that doesn’t have a lot of recent eBird reports.
    • on iOS, the ‘Select Months’ view also shows sightings for the past 9 years, but only for the specific months you select.  Tap the month(s) to select the ones you want sightings for.  A green checkmark will show to the right for each month selected.  You can select as many months as you want the data for. Perfect for planning trips!
  4. Once you’ve adjusted the filters to your liking, tap on ‘Save’ in the upper right of your BirdsEye screen.
  5. The species list is now filtered according to your date and range settings, and each chart shows the birds abundance based on the same choices. You will see your current filter settings summarized in the blue bar on the bottom of the screen.  These settings are maintained until the next time you make adjustments to them.

PRO TIP – When you are traveling to areas with few eBird reports, change the distance in the filter settings to 50 miles. This will combine the sightings for a larger area and give you a better idea of the birdlife in the general area.

Happy Birding from the BirdsEye team!

Tip of the month: Using the Filter Settings

BirdsEye is the best app to see what birds are being seen around you. Make sure to check in regularly with BirdsEye to see what’s being seen near your regular hotspots, or explore distant areas to plan birding stops on your next outing, vacation or business trip.

The two main views for checking on sightings are the maps view and the abundance charts.

Maps

This view is straight forward and provides all sightings of a species with eBird reports from the past 30 days. You can zoom and pan the maps to search a broader area or for a more close up view.

sightings-s

Abundance Charts

Abundance Charts provide bar graphs that show how frequently a species is reported based on the Filter settings for that location. Only those species within the time and distance settings are shown in the list.


abundancemaps-s

How to customize the lists

Filters allow you to customize the search by proximity to your location and how recently the sightings were made. You can change the search distance, miles or kilometers, and the timeframe. Focus in on just the birds that have been reported a single park,  or all sightings within 50 miles or kilometers. Tap the filter icon in the top right of the BirdsEye screen to make the adjustments. This is perhaps the most powerful feature of BirdsEye.

By working with the filter options you can adjust the view for your current location, any hotspot or one of your designated ‘Favorites’

Here’s how to adjust the filter settings in ‘Nearby Birds’, but the same instructions also work when looking at a specific hotspot in the ‘Browse by Location’ or ‘Favorite Locations’ sections of BirdsEye:

  1. Under ‘Nearby Birds’ tap the funnel icon in the upper right of the screen.
  2. Drag the ‘Distance to search’ slider to the appropriate range you want to view.
  3. Select the ‘Search Timeframe’ for the sightings.
  • when the ‘Recent Weeks’ option is selected you’ll get another slider that you can adjust for any sightings within the past 1-4 weeks
  • the ‘Current Month’ (iOS member feature) tab provides a view of all birds reported over the past 9 years or so. This option is especially useful when you are birding in a location that doesn’t have a lot of recent eBird reports.
  • the ‘Select Months’ (iOS member feature) view also shows sightings for the past 9 years, but only for the specific months you select.  Tap the month(s) to select the ones you want sightings for.  A green checkmark will show to the right for each month selected.  You can select as many months as you want the data for. Perfect for planning trips!

4. Once you’ve adjusted the filters to your liking, tap on ‘Save’ in the upper right of your BirdsEye screen.

5. The species list is now filtered according to your date and range settings, and each chart shows the birds abundance based not the same choices. You will see your current filter settings summarized in the blue bar on the bottom of the screen.  These settings are maintained until the next time you make adjustments to them.

PRO TIP – When you are traveling to areas with few eBird reports, change the distance in the filter settings to 50 miles. This will combine the sightings for a larger area and give you a better idea of the birdlife in the general area.